Setting up a blog

I've wanted to create a blog for many years now. Originally I wanted to build this up from scratch, but I've come to realize that I've got limited time in this world. Therefore, I've used Ghost which is an open source publication software. It's like WordPress, but with less annoying stigma around it. Ghost provides the technical stack, someone provides the theme, and I provide the content.
To preface this, I hate long blog posts. It takes a truly disciplined mind to read every word of those long blog posts. You're probably here to take inspiration and find an easy tutorial to follow along with. That's what I'll focus on making.
So if you wanted to self host your own nice blog like this, it's super simple with ghost. I have a server that i run in my own house. For all intents and purposes, you can think of this server as a glorified docker container runner. I use docker orchestration software like Portainer to give me a UI to work with, but you can do all of this from your own house.
So in this post, we'll cover setting up DNS, Reverse Proxy with SSL Termination, and ultimately the actual ghost and associated db setup. We will take care of all of this with docker compose and a few quick config files.
DNS
So let's start with DNS. I like to separate the services on my server with different subdomains. If you don't know what a subdomain is, keep reading.
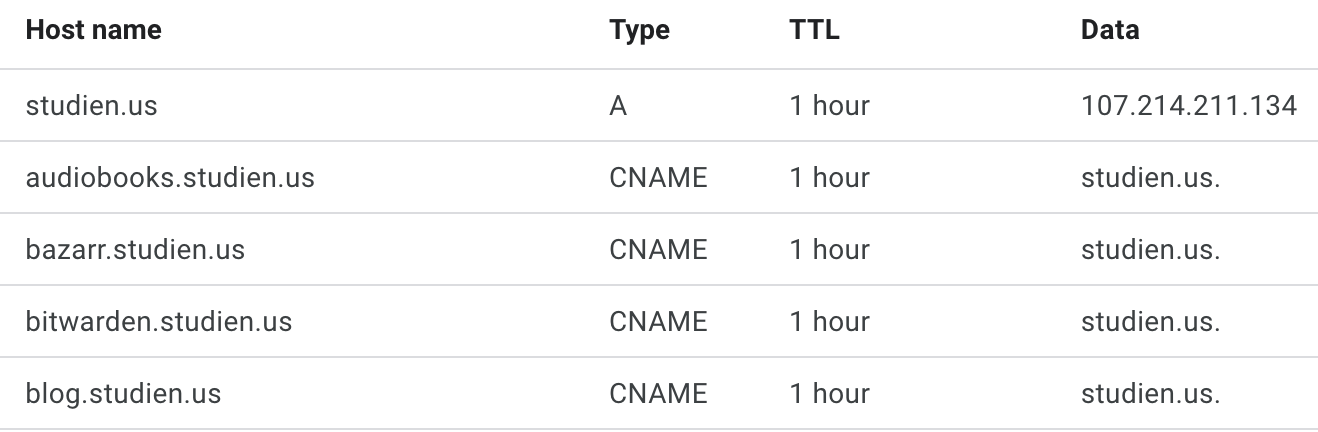
Do you see the URL in the top of your browser right now? It probably says something like https://blog.studien.us. My domain name that I bought is studien.us, and blog is the subdomain. I create a DNS record called a CNAME to connect that subdomain up with my A record. The A record connects studien.us with an IP address. The IP Address is where my server is on this big internet.
So yea this is small subsection of my DNS records for my studien.us domain. I won't bother hiding the other stuff because it's not really a secret and anyone with an ounce of technical knowledge can find this themself.
Reverse Proxy with SSL termination
I've used Caddy is my reverse proxy of choice for a long time now, and it's been super easy to use and configure. I found it easy to pick up for my usecase compared to these other reverse proxy solutions out there. You're welcome to use another reverse proxy though.
So let's create a file called docker-compose.yml
version: "3.7"
services:
  caddy:
    image: caddy:latest
    container_name: caddy
    ports:
      - "80:80"
      - "443:443"
      - "443:443/udp"
    volumes:
      - <YOUR_PATH_HERE>/Caddyfile:/etc/caddy/Caddyfile
      - <YOUR_PATH_HERE>/data:/data
      - <YOUR_PATH_HERE>/config:/config
Change <YOUR PATH HERE> to represent a directory on your local machine.
Alright great, this is a simple docker compose that does 3 things.
- Pulls the docker image
- Connects ports from your machine to the inside of the docker container
- Connects directories from your machine to the inside of the docker container.
Go to the path you set above and create the Caddyfile. The other files will be created automatically. Once you've created the Caddyfile, add the following:
blog.studien.us {
        reverse_proxy <YOUR_MACHINE_IP>:3030
        log {
                output stdout
                format console
        }
}
Change <YOUR_MACHINE_IP> for your internal IP address. Also change the domain name to yours, so that it doesn't say studien.us. In the next step, we'll put the ghost software on the port 3030.
What's beautiful about this is that the Caddy docker image uses a service called Let's Encrypt. Let's Encrypt has a process where it checks your DNS records. It compares the machine's external IP address with those DNS records. If everything works out, you'll get the SSL for your blog subdomain. That means https will work, and you'll get SSL termination at the reverse proxy.
Ghost
The ghost setup is actually stupid simple. Open the docker-compose.yml file that you created for Caddy and append the following to it.
ghost:
    image: ghost:5.80
    restart: always
    ports:
      - 3030:2368
    environment:
      database__client: mysql
      database__connection__host: ghostdb
      database__connection__user: root
      database__connection__password: <DB_PASSWORD_FROM_BELOW>
      database__connection__database: ghost
      url: https://blog.studien.us
    volumes:
      - /mnt/ghost/app:/var/lib/ghost/content
  ghostdb:
    image: mysql:8.0
    restart: always
    environment:
      MYSQL_ROOT_PASSWORD: <CREATE_A_DB_PASSWORD_HERE>
    volumes:
      - /mnt/ghost/db:/var/lib/mysql
Replace the password information with same password in each of those values above. Also change the url to match yours.
Finally, you can simply use docker compose on that file to up the blog. In a minute or two, you can navigate to your url set above. Hopefully, you should see the blog now.
To create an admin account, you'll need to go to route /ghost. That would make my admin URL endpoint https://blog.studien.us/ghost. In here, you can customize the UI, create posts, and much much more.
I'll leave the rest up to you!